DynDNS on your own domain
home.yourdomain.com instead of a rented hostname — connected in minutes via a TSIG key, at no extra cost.
Most DynDNS providers lock you into their domains or charge extra for custom ones. dremaxx doesn’t: connect any domain whose DNS zone accepts TSIG-signed RFC 2136 updates — your own name server or a dremaxx DNS Hosting zone — and create as many DynDNS entries under it as your plan allows.
Your name, our infrastructure — free
Connecting your own domain costs nothing — it is included in every DynDNS plan, even the free one.
Create entries at any depth under your domain — or update the apex domain itself.
Updates are cryptographically signed RFC 2136 transactions — no open dynamic updates, no zone transfer needed.
Optionally publish *.your-hostname with every update — perfect for reverse proxies and per-service subdomains.
Connecting your own domain takes one TSIG key and two minutes in the console:
- A domain whose authoritative DNS server accepts RFC 2136 dynamic updates with TSIG — e.g. your own BIND, PowerDNS or Knot server.
- No own name server? Host the zone with dremaxx DNS Hosting — TSIG keys are built in there.
- A free dremaxx account with the (free) DynDNS service activated.
Connect your domain step by step
On your DNS server, generate a TSIG key (e.g. tsig-keygen -a hmac-sha256 mykey with BIND) and allow it to update the zone. With dremaxx DNS Hosting, create the key directly in your zone’s settings — no shell required.
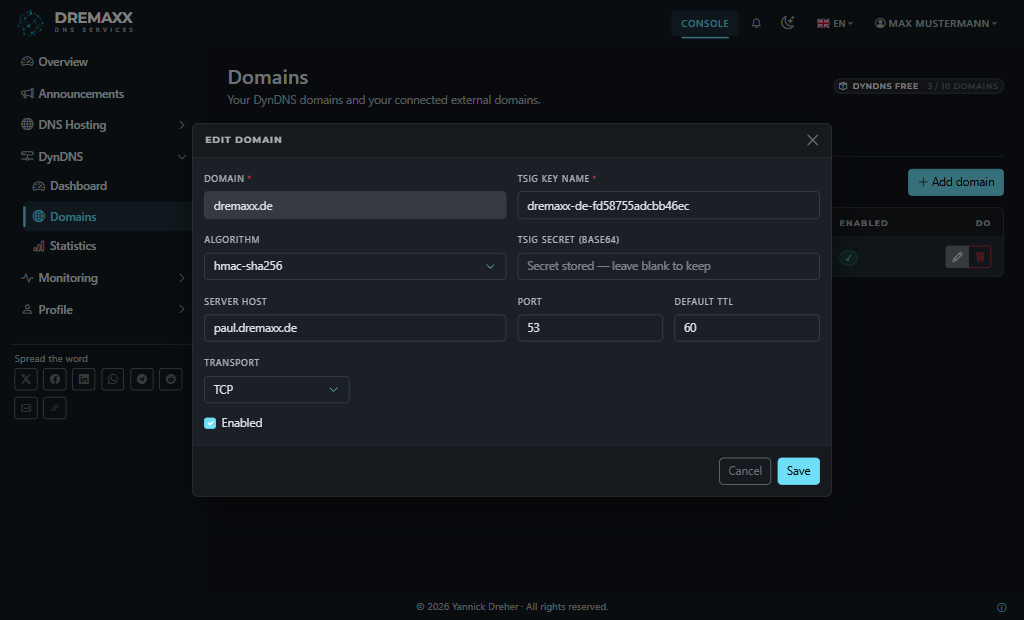
Open DynDNS › Domains › External domains and click “Add domain”. Enter your domain, the TSIG key name, algorithm and base64 secret, plus the DNS server host, port and transport. Save — that’s the whole connection.
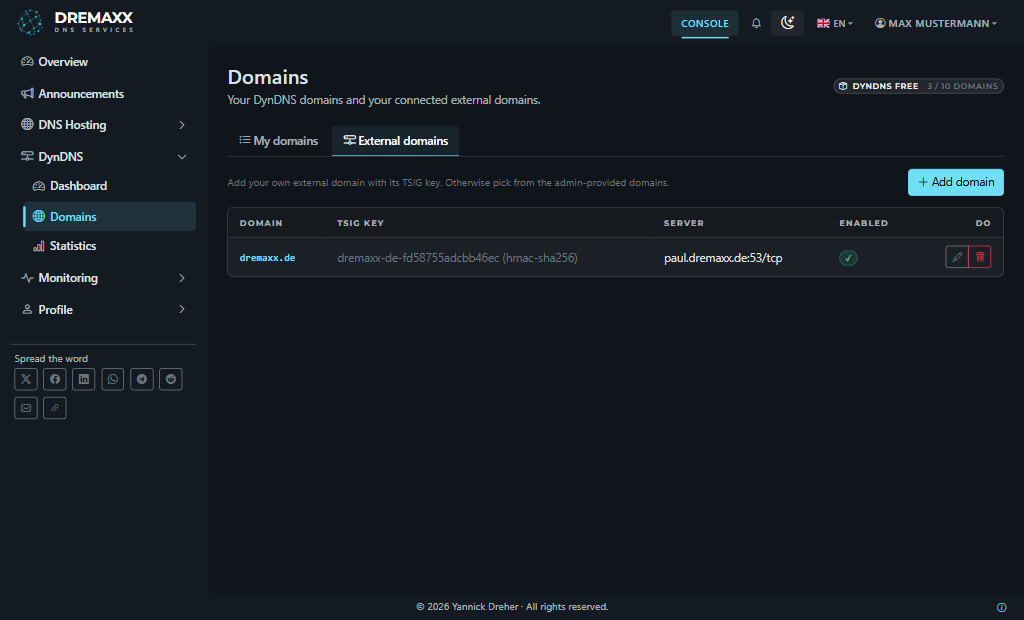
The domain now appears in your “External domains” list with its TSIG key and target server. From here you can edit the key, disable the domain or remove it at any time.
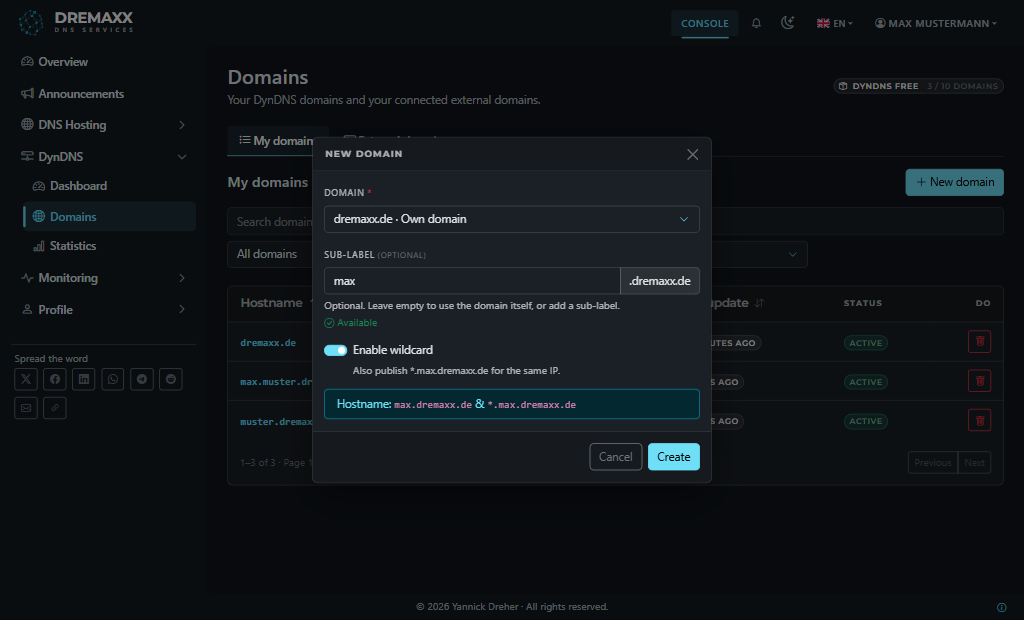
Switch to “My domains” › “New domain” and pick your own domain from the list. Add an optional sub-label (e.g. “home”) or leave it empty to update the domain itself — wildcard optional. Every entry gets its own router credentials.
Open the new entry — username, password and update URL work exactly like on a system domain. The entry stays “Pending” until the first update arrives. Follow the setup guide for your router below.
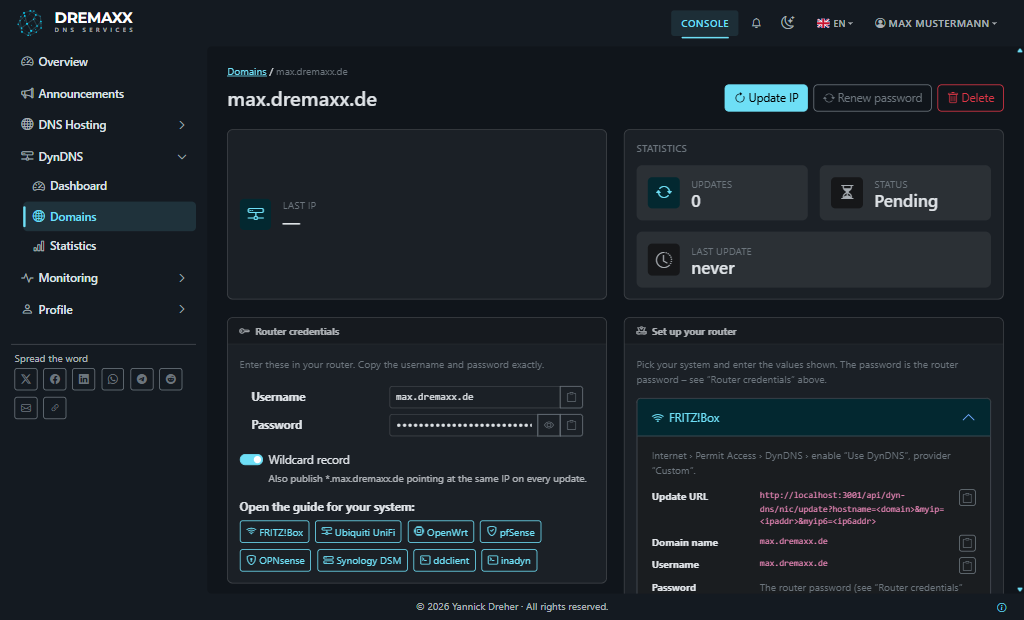
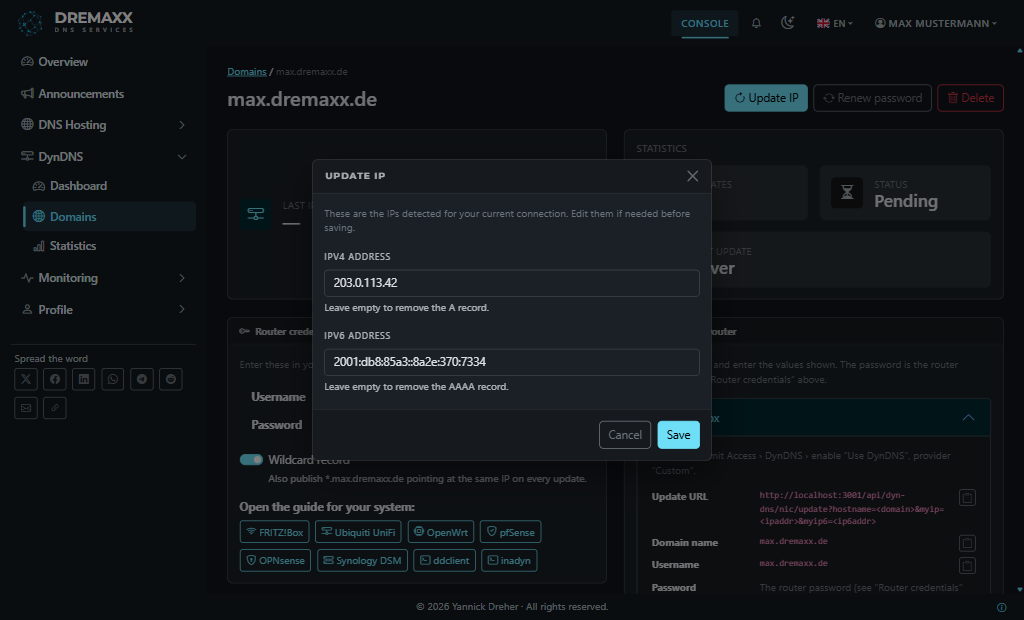
Your router sends the first update automatically on its next IP change — or you push one right away with “Update IP”: the console pre-fills your current IPv4/IPv6 and publishes the records immediately.
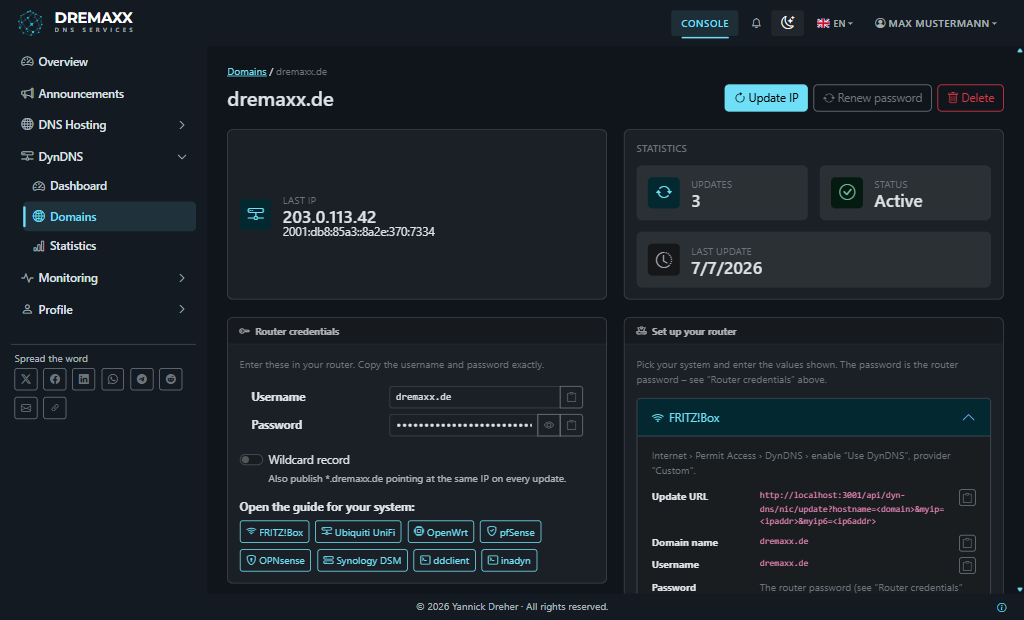
The entry switches to “Active”, the last reported IPv4/IPv6 and every update show up in the history — from now on your own domain follows your home IP fully automatically.
Security & hosting notes
Connect your domain today — free
Sign up, add your TSIG key and your own domain becomes a DynDNS domain in minutes.
Sign up free